Forgejo is a community fork of Gitea, created as a more independent home for self-hosted Git. A key reason to choose it over Gitea is its stronger community governance and focus on open development.
The latest major release, Forgejo v15.0, launched on 16 April 2026 with simpler runner setup, ephemeral runners, OpenID Connect support, and repository-specific access tokens.
1.) Dataset Configuration & App Install Configuration
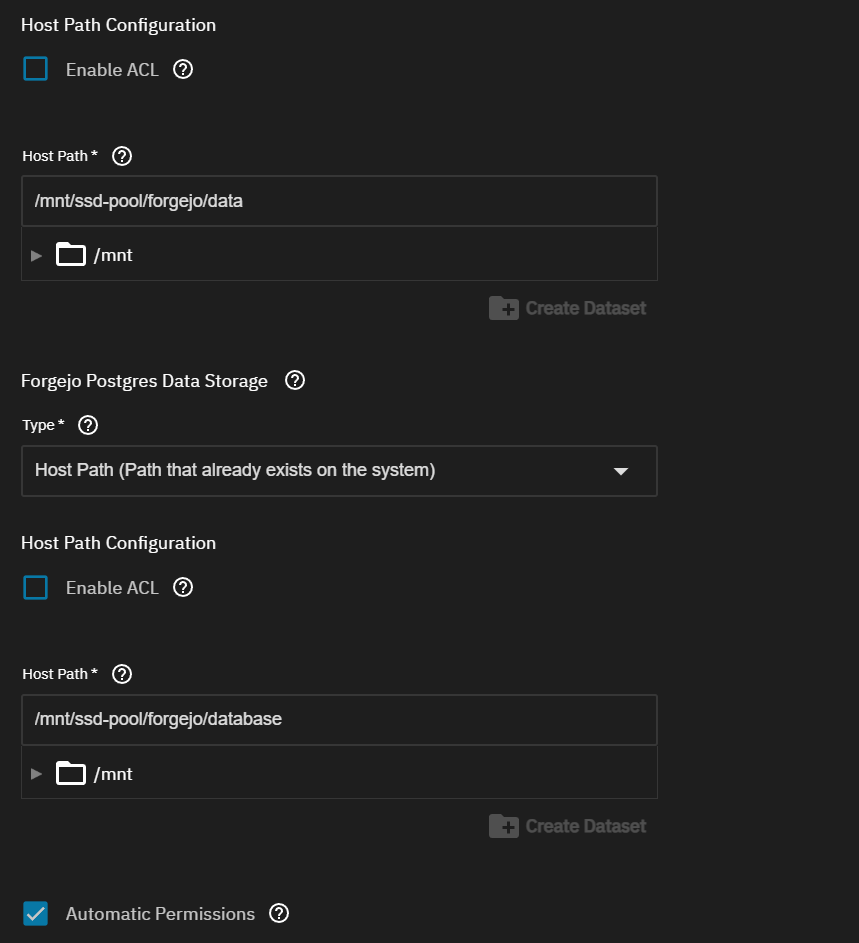
Create yourself 2 datasets for config-data and database. You can check the box for “Automatic Permissions”
NOTE: Forgejo app data and Forgejo DB data do not use the same UID/GID.
Forgejo itself runs as 568:568 (apps:apps), while Postgres runs as 999:999 (netdata:docker)
2.) Initial Forgejo Configuration
Before diving in, it’s a good idea to put Forgejo behind a reverse proxy such as Traefik, NGINX Proxy, or NPM Plus, and give it a nice home on a subdomain like forgejo.homelab.local. Once that’s in place, you can launch the Forgejo setup wizard either through your domain or directly from your TrueNAS IP and exposed port, such as http://192.168.1.2:30142. And if the setup wizard feels a little overwhealmin, no worries .. every option can be changed later, so you’re not locking yourself into anything.
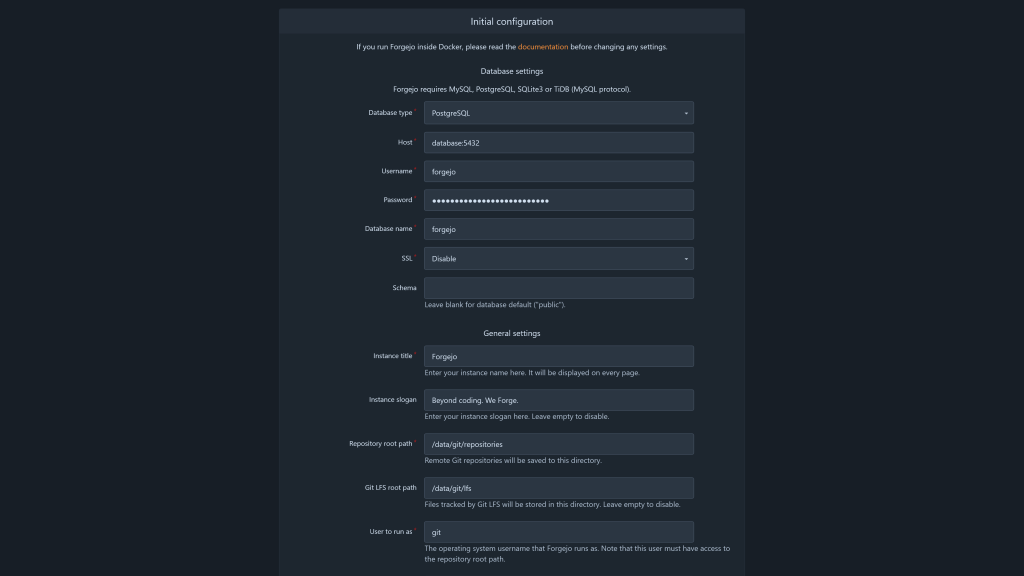
General Settings:

The General section contains information that must remain unchanged, details you may modify if desired, and certain elements that require verification or updating to ensure accuracy.
- Instance title: Give your Forgejo instance whatever name you like. This is mostly for branding
- Instance slogan: Add a short tagline if you want to give your instance a little extra personality.
- Repository root path: This is the directory where Forgejo stores repository data
- Git LFS root path: This is where Git LFS files are stored
- User to run as: This is the system account Forgejo runs under, typically something like
git. Forgejo recommends using a dedicated system user, and setting this incorrectly can prevent Forgejo from starting, so it is usually safest to leave it as-is - Server domain: Set this to the custom domain or subdomain you want to use, such as forgejo.homelab.local
- SSH server port: Leave this as-is unless you are intentionally using a different SSH port.
- HTTP listen port: Usually safe to leave alone, especially if Forgejo is running behind a reverse proxy.
- Base URL: Set this to the full public address of your Forgejo instance, including http:// or https://, such as https://forgejo.yourdomain.com.
- Disable self-registration: For a private homelab setup, it is usually a good idea to leave this enabled so random users cannot create accounts.
- Enable update checker: This one is completely up to you, depending on whether you want Forgejo to check for updates automatically.
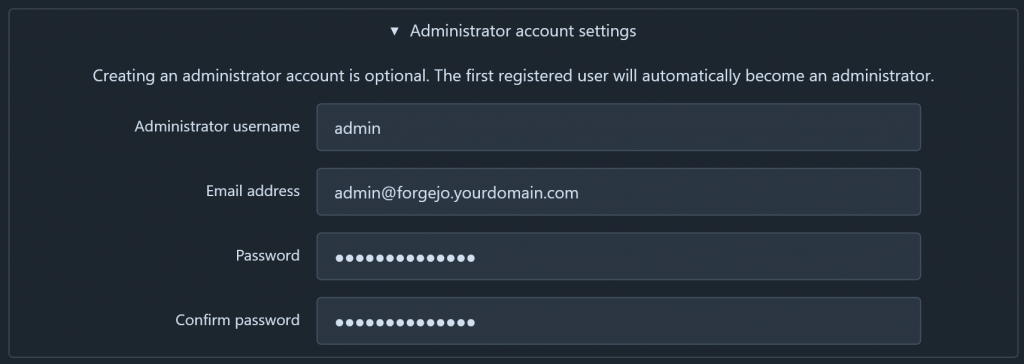
Here you can setup your first user (who will become the instance’s administrator), which I recommend. That said, I think there are two approaches for administration you can go for here:
- Separate admin and personal accounts (recommended): You will create a user named
forgejofor your first user, and only handle administration of the instance through this account. You will then create a second user with more limited permissions to serve as your personal account where you do your non-administrative activities in Forgejo.- Pros: Possibly better for security, your dashboard won’t be cluttered by all activity from the server.
- Cons: You’ll have to log out and switch accounts to handle administrative tasks.
- One account to rule them all: You will have one user that will serve as your primary/regular Forgejo user and handle all administration through as well.
- Pros: Everything is in one place, no account switching to handle admin tasks – convenient.
- Cons: Very busy dashboard (by default) if your instance has other users. Potential to make mistakes due to unchecked permissions.
I recommend using two separate accounts. This way, I can fully concentrate on my projects when needed and easily switch to the admin account to manage Forgejo tasks.
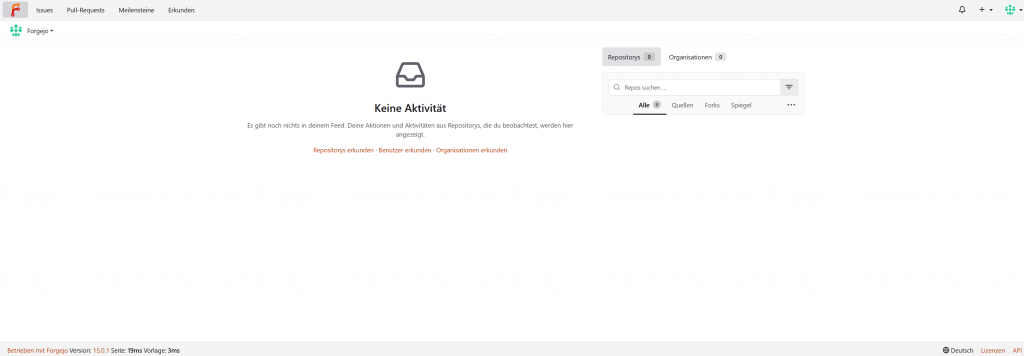
Our Dashboard
Additional Configuration
With the initial configuration wizard complete, the rest of the setup is in your hands. While you can start using your Forgejo instance right away, there are a few important steps that are best addressed early on.
Important: Forgejo is a hard fork of Gitea, so you will often encounter the name Gitea when exploring the backend. For instance, Forgejo’s main /data directory contains a folder named ./gitea, which stores Forgejo’s primary configuration. This is simply due to their shared origins, so there’s no need for concern.
Forgejo’s configuration is generally handled in two places:
- A primary configuration file located at
/data/gitea/conf/app.iniwithin the container, with a matching location depending on your volume mapping outside of the container (mine is at/mnt/user/appdata/forgejo/data/gitea/conf.ini). - The admin panel in the web interface.
Most configuration settings are managed in app.ini, with a few exceptions. You can explore the full range of configuration options for app.ini here, allowing you to tailor your instance beyond the basic recommendations.
In app.ini
Important: Be sure to restart your Forgejo instance after making any of these changes!
Recommended changes
[security]REVERSE_PROXY_TRUSTED_PROXIES =– Set this to the IP of your reverse proxy for additional security. If your reverse proxy and forgejo instance are both deployed via Docker, you can set it to the reverse proxy’s IP on it’s docker network.
[webhook]ALLOWED_HOST_LIST = loopback,private,*.yourdomain.com– this will allow your various other self-hosted services to use Forgejo’s webhook features.
[migrations]ALLOWED_DOMAINS =– Set this to any external git providers you might be migrating repositories (likegithub.com,*.github.com). You can put the subdomain for you Gitea instance here as well if you are like me and planning to migrate data from Gitea to Forgejo.ALLOW_LOCALNETWORKS = true– Makes sure any local git providers you may want to migrate from are allowed (from stuff like NAT hair-pinning)
Optional changes
[repository]DEFAULT_REPO_UNITS = repo.code,repo.releases,repo.issues,repo.pulls– Most repos I make don’t need access to the full feature-set of Forgejo, so this is a more sane default to me (compared torepo.code,repo.releases,repo.issues,repo.pulls,repo.wiki,repo.projects,repo.packages,repo.actions). This just keeps the UI for a repo as minimal as possible.
[server]DISABLE_SSH = true– I use Forgejo exclusively over https, so I just turn this off.LFS_START_SERVER = true– Nice to have feature, I’ve used it in the past for game development projects that benefit from LFS features like file locking.
[other]SHOW_FOOTER_TEMPLATE_LOAD_TIME = false– I don’t care to see this information personally.
3.) Setting up Forgejo Runner
Preparation
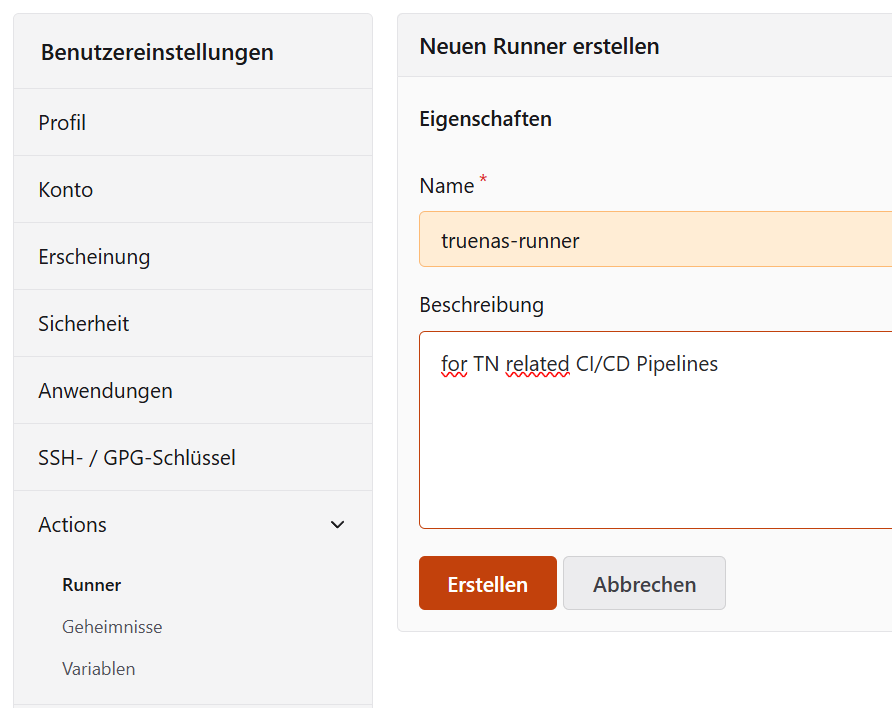
Before wesetup the runner in TrueNas, we need to get a Runner Registration token and the Runner UUID from Forgejo. This can be done in one of a few places, depending on how you want to scope the runner to your Forgejo instance (reference). For this guide I will recommend registering your runner to the “Instance” level. To do this, go to Site Administration > Actions > Runners and click on Create new Runner and copy the token and uuid that displays in the popover. Save this for the next step.
Now you can setup URL,UUID, Token & Label forthe Forgejo Runner in TrueNas and deploy it.
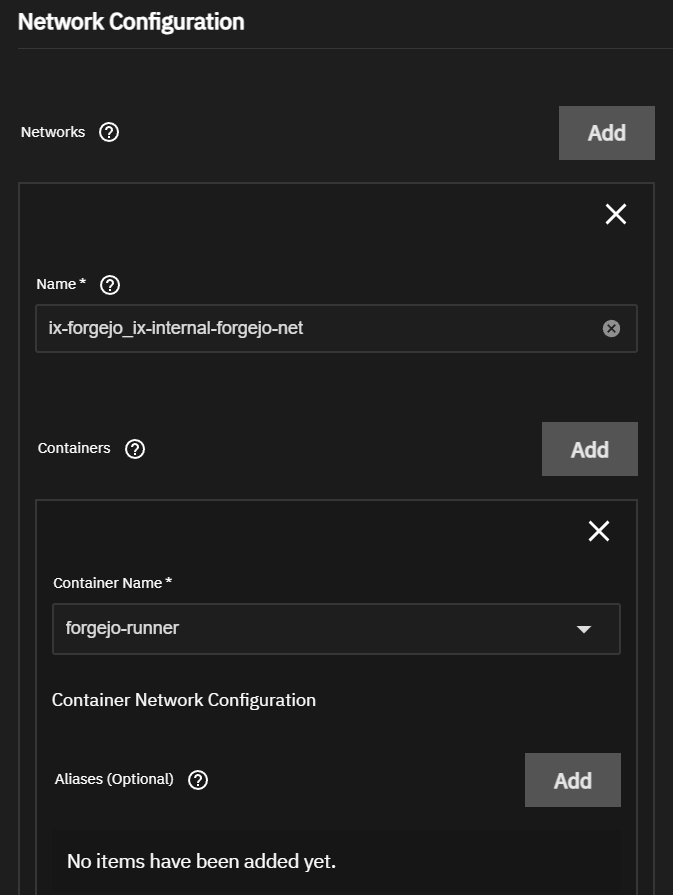
NOTE: Forgejo and Forgejo Runner run as separate containers, so they need to share a Docker network to communicate directly. By attaching the runner to the same internal network as Forgejo, the runner can reliably register itself, poll for jobs, clone repositories, and report build status without relying on external routing. This also avoids exposing extra ports and keeps communication private and more predictable inside the host.
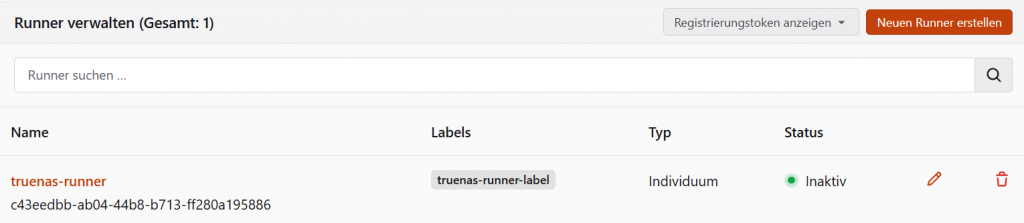
Once the runner is properly registered, it will show on the Forgejo Runner Configuration Page
My Verdict
This was intentionally a minimal setup focused on getting Forgejo and Forgejo Runner working on TrueNAS. There is still more to configure for a production-ready setup, including reverse proxying, HTTPS, 2FA, backups, and general hardening, but this is a solid first step. If your goal is simply to get started with self-hosted Git and CI/CD, this setup gives you a practical base to build on.